Spots are filling up quickly for 2024 Quilt Retreats. Hope to see you there!
UFO Retreats! (Unfinished Objects)
UFO (Unfinished Objects) Retreats at my home. These retreats have up to 8 people attending. Let me know if you have a group that would like to come and we can set a date just for your group. I will be updating new retreats as we need them. Attached is a form to fill out and send to me along with a $25 deposit to hold your reservation. Total cost is $150 which includes 3 nights lodging and 9 meals. You bring your own projects to work on.
Click here for the registration form for the UFO Retreats.
Dates:
2024
April 18 – April 21 >> 4 openings
April 25 – 28 Full
May 8 – May 11 >> 4 openings
May 16 – 19 Full
June 20 – June 23 >> 1 openings
July 11 – July 14 >> Full
July 25 – 28 Full
August 15 – August 18 >> 0 openings
September 12 – 15 Full
September 19 – September 22 >> 2 openings
September 26 – September 29 >> Full (private)
October 10 – October 13 3 openings
November 14 – November 17 3 openings
2025
Febuary 27 – March 2 Full (private)
March 6 – March 9 Full (private)
April 10 – April 13 5 openings
May 15 – May 18 3 openings
June 19 – June 22 4 openings
July 17 – July20 4 openings
August 14 – August 17 6 openigns
September 2 – September 7 Full (private)
September 18 – September 21 6 openings
September 25 – September 28 Full (private)
October 23 – October 26 5 openings
November 13 – November 16 5 openings
2024 Carol Joy Holling Spring Retreats
Ashland, NE
Spring Quilt Retreat
Sunday, April 28 – Tuesday, April 30
Add an additional day for $100 and leave
Wednesday afternoon, May 1st


Fall Quilt Retreat
Thursday October 17 – Saturday October 19
Add an additional day for $100 and leave
Sunday afternoon October 20th
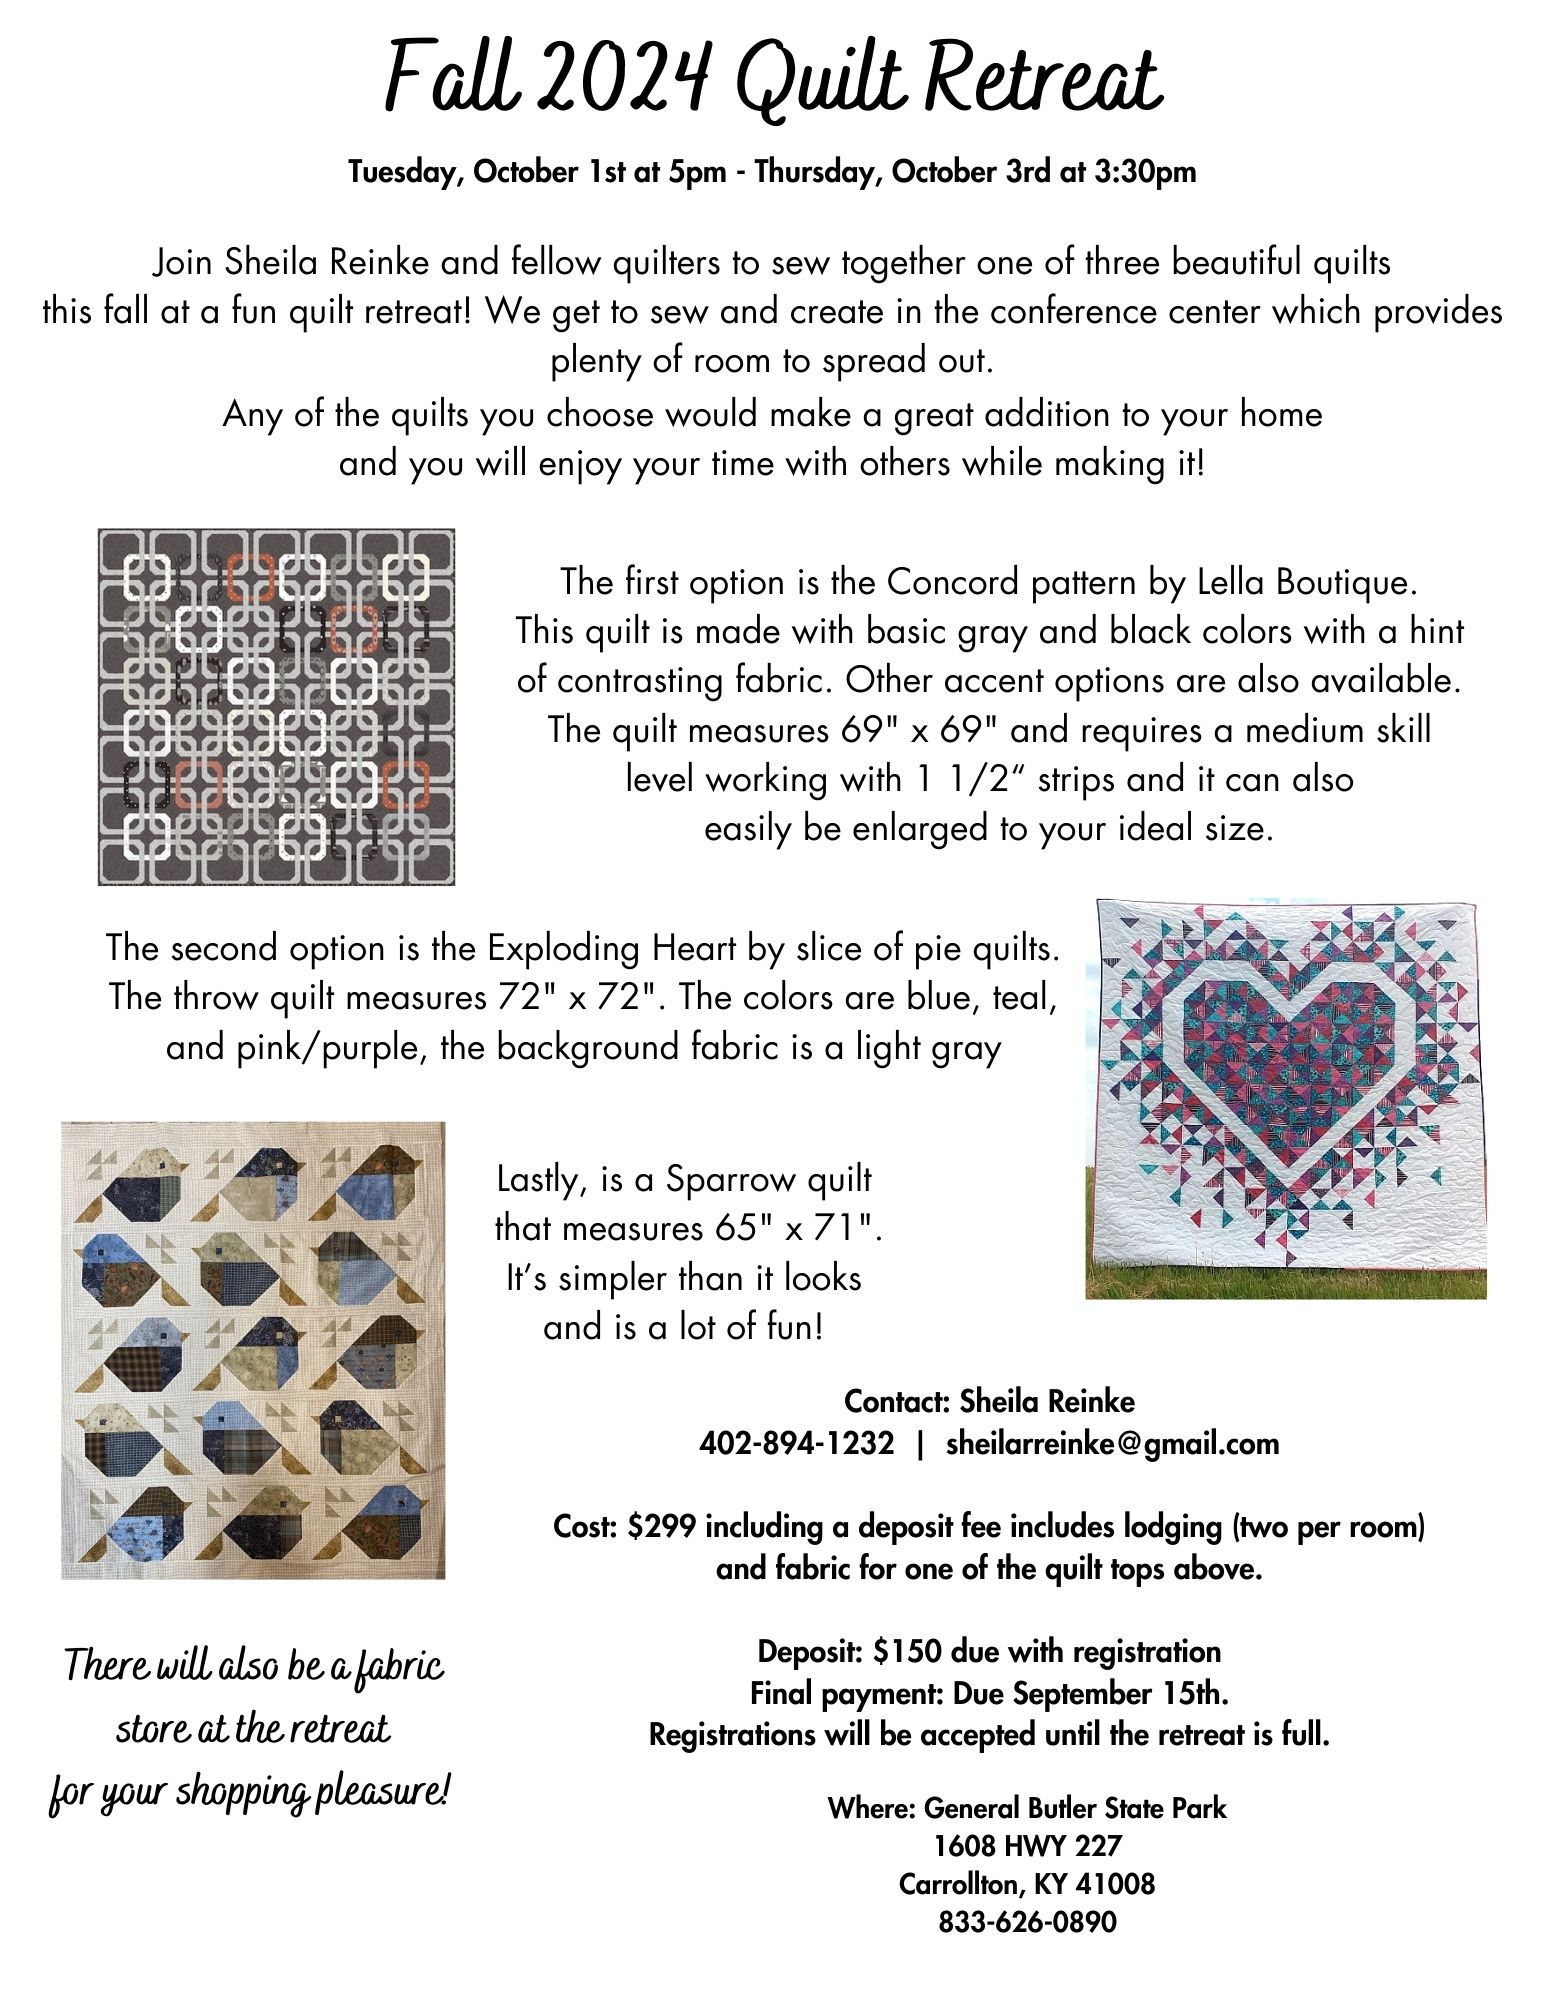
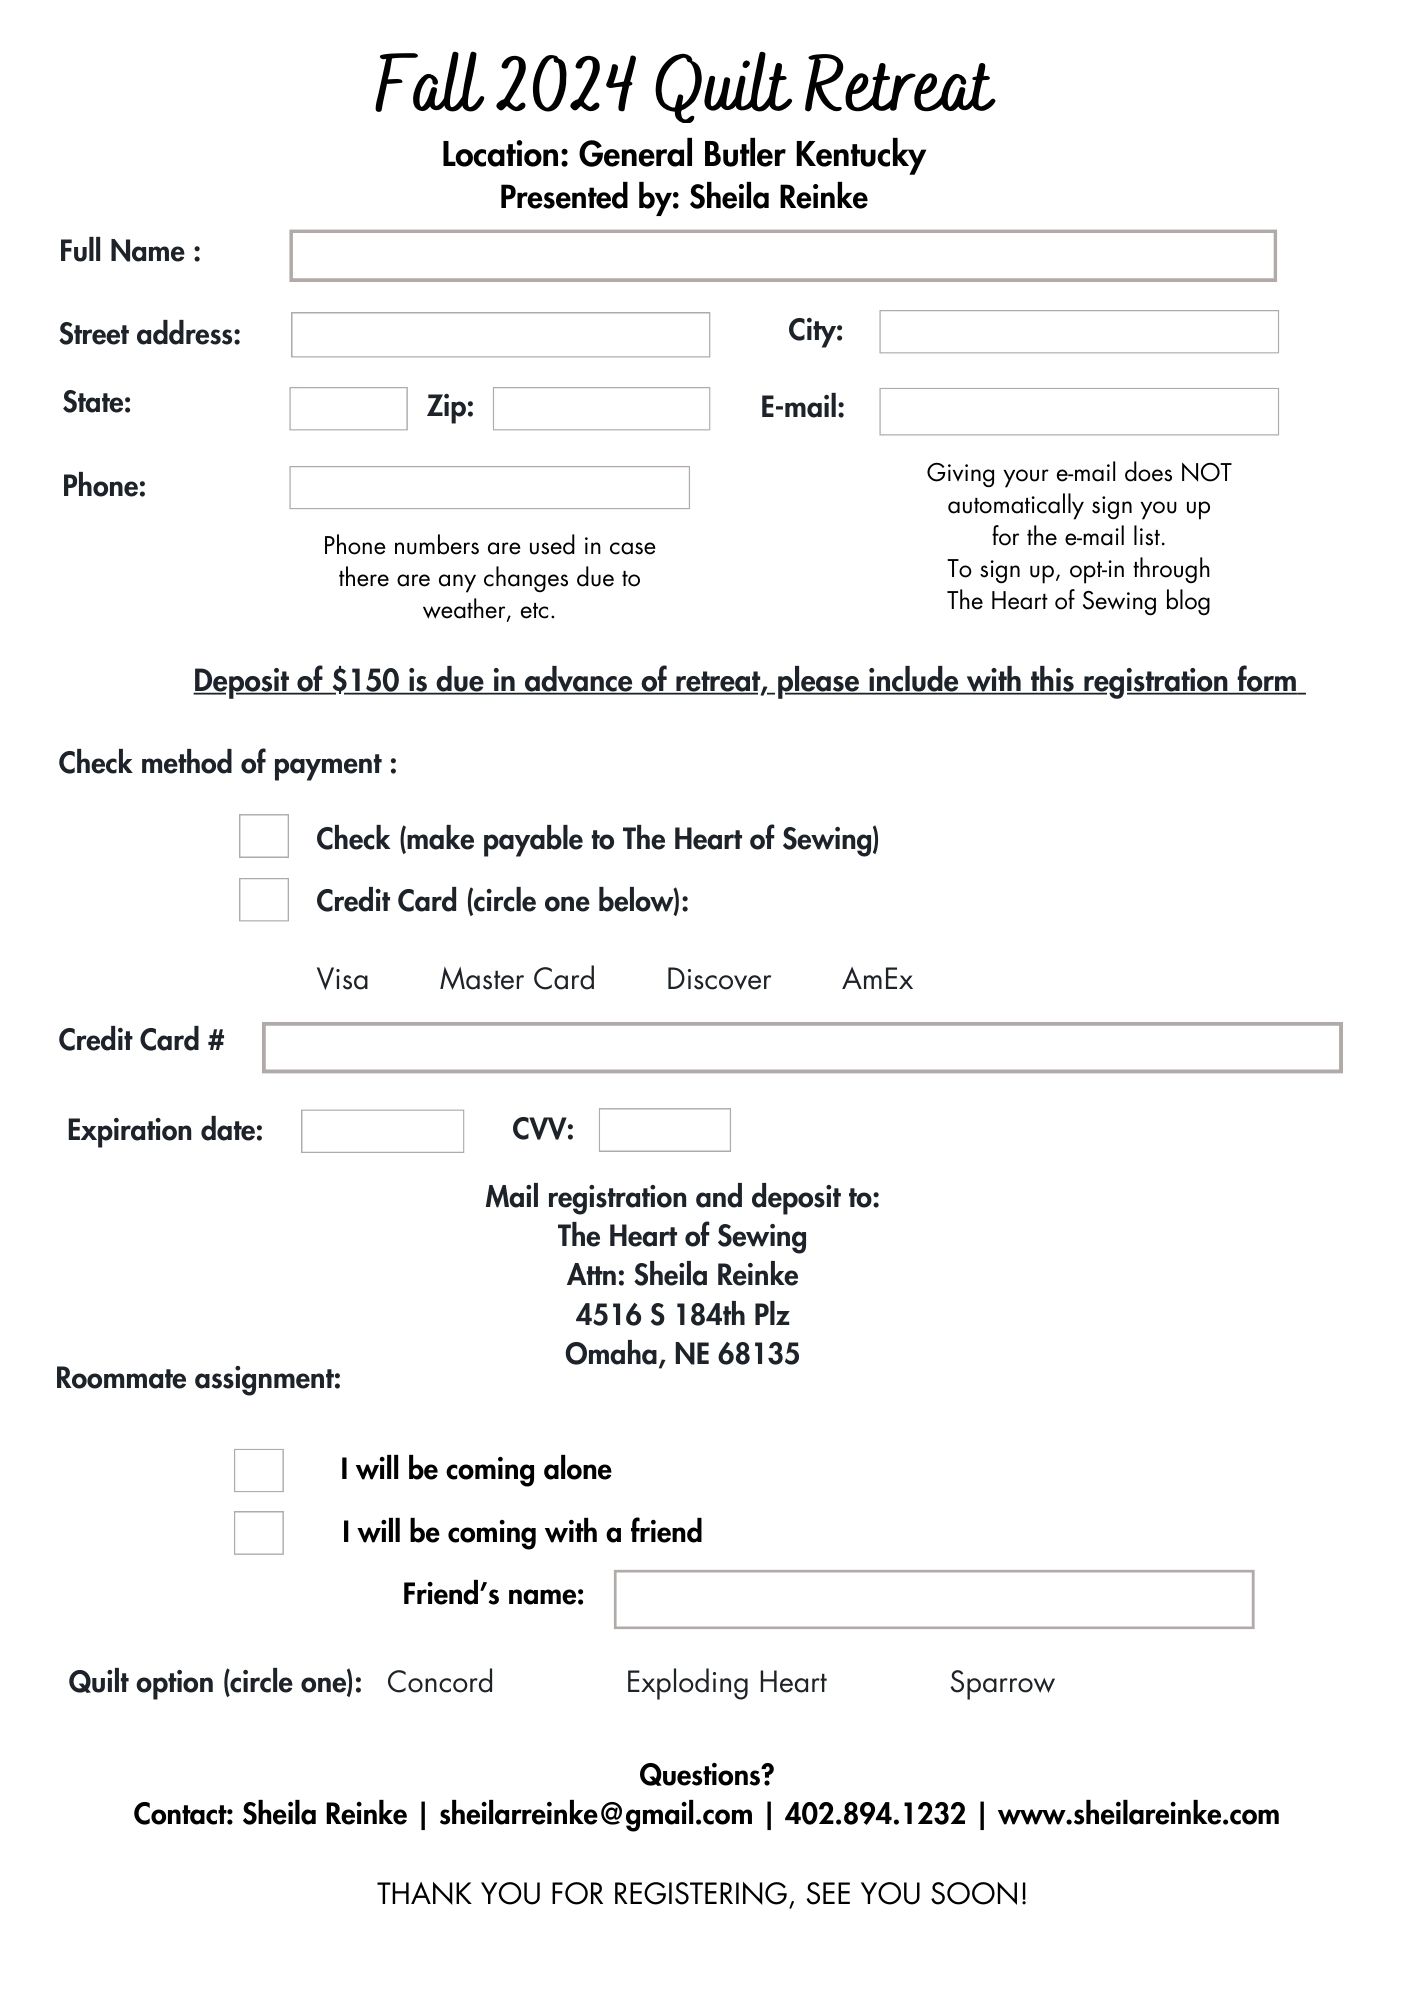
Kentucky Retreat at General Butler State Park Fall 2025
Fall 2025 Retreat
Monday, Sept. 30, starting at 5:00 p.m.
ending Wednesday, Oct. 2 at 3:30 p.m.
For the latest news and updates about quilt retreats, be sure to sign up for our mailing list so you don’t miss out!

